In 2019, I tried to get this very blog to be deployed automatically to the production server after each push to the corresponding GitHub repo. A couple of issues were found and after much frustration, the whole idea was scrapped. Fast forward many months later, and with new experience acquired and new tools available since, it was time to try again.
The previous attempt failed because of three main reasons:
- My blog is composed of two repositories to clone (Grav and the actual blog) and Deployer isn’t meant to deal with multiple repos;
- Webhook was creating nightmarish permission issues;
- A brief downtime was observed when GitHub dispatched the webhook.
Those issues could probably be resolved now by :
- Moving Grav setup out of the automated deployment process and focus only on the blog part;
- Actually fixing the permission issue with a mix of new umask and acl knowledge;
- Replacing Webhook for Github Actions.
Note that by moving Grav outside the scope of the deployment, it effectively bypass that zero down time feature. Anything that goes wrong here WILL cause downtime and will require ssh access to fix it. But for now let’s start by having the whole process up and running, then we’ll move to a more robust Grav deployment. As for dispatching the actual command to deploy the website, Webhook can now be replaced with Github Actions, especially now that Deployer has it’s own official Action.
Spoiler alert, the whole process was successful this time! The following guide is a summary of the steps I used to get the automated deployment of this blog to my production server using Deployer and GitHub Actions.
Creating the Deploy Script
First thing that need to be done is creating a new Deployer script. I started by installing Deployer again and setting up the test server using the same steps as before. Once the Vagrant box up and running, I went back to the basic, which includes manually installing Grav and the blog part to make sure everything works.
So on the test server, from the website directory (/home/vagrant/bbqsoftwares in my case) :
git clone https://github.com/getgrav/grav.git .
rm -r user
git clone git@github.com:lcharette/website.git user
bin/grav install
From there, the blog should appear in the browser (which I linked to bbq.test domain in my case). Time to get the Deployer script working. Create a deploy.php file anywhere on your computer (as long as you run dep commands from the same directory):
<?php

namespace Deployer;

require 'recipe/common.php';

// Project name
set('application', 'BBQ');

// Project repository
set('repository', 'https://github.com/lcharette/website.git');
set('branch', 'master');

// Will be effective with Deployer 7.0
// set('current_path', '{{deploy_path}}/user');

// Writable dirs by web server
set('writable_dirs', []);
set('allow_anonymous_stats', false);

// Hosts -- REPLACE WITH YOUR HOST
host('bbq.test')
    ->user('vagrant')
    ->stage('dev')
    ->set('deploy_path', '/home/vagrant/bbqsoftwares');

// Tasks
desc('Deploy your project');
task('deploy', [
    'deploy:info',
    'deploy:prepare',
    'deploy:lock',
    'deploy:release',
    'deploy:update_code',
    'deploy:shared',
    'deploy:writable',
    'deploy:clear_paths',
    'deploy:symlink',
    'deploy:unlock',
    'cleanup',
    'success'
]);

// [Optional] If deploy fails automatically unlock.
after('deploy:failed', 'deploy:unlock');
Simply run the script dep deploy dev and the current content of the repo will be cloned from GitHub. Now, Deployer 6 will, by default, put everything in the current/ directory, a path that is hardcoded as I found before. But Grav serve the blog data from the user/ directory. The currently-in-beta Deployer 7 introduce a new configuration variable to change the destination of the current_path (commented above). In the meantime, we’ll remove the user/directory we introduced manually and symlink current/ to user/.
sudo rm -R user/
ln -s current user
Refreshing the blog in the browser will display an error saying Theme 'quark' does not exist, unable to display page. That’s ok, since Grav wasn’t “installed” yet and the dependencies defined in the user part where not automatically downloaded (but I knew that). To do just that, we’ll define the grav:install and grav:clearcache tasks in deploy.php and tell them to execute in the main Grav folder.
// Install grav task
task('grav:install', function () {
    within('{{deploy_path}}', function () {
        run('bin/grav install');
    });
});

// Clear grav cache task
task('grav:clearcache', function () {
    within('{{deploy_path}}', function () {
        run('bin/grav clearcache');
    });
});
We also add them to the deploy task :
desc('Deploy your project');
task('deploy', [
    'deploy:info',
    'deploy:prepare',
    'deploy:lock',
    'deploy:release',
    'deploy:update_code',
    'deploy:shared',
    'deploy:writable',
    'deploy:clear_paths',
    'deploy:symlink',
    'grav:install', // <--- HERE
    'grav:clearcache', // <--- HERE
    'deploy:unlock',
    'cleanup',
    'success'
]);
Here it’s important to execute them after the deploy:symlink task. That task is the one actually creating the link between the cloned bit (in releases/x/) and current/ (which is also user/) and we need to have the Grav commands executed on the current file set.
user/. But for now, I’m focusing on getting this to work only and will seek improvement for this later.We can now test that the deploy script works : $ dep deploy dev

The last thing to do for the deploy script is to add the production host. The whole process will be done using the deploy user which we’ll setup in the next part.
host('bbqsoftwares.com')
    ->user('deploy')
    ->stage('prod')
    ->set('deploy_path', '/var/www/bbqsoftwares.com');
The final deploy.php script is as follows:
<?php

namespace Deployer;

require 'recipe/common.php';

// Project name
set('application', 'BBQ');

// Project repository
set('repository', 'https://github.com/lcharette/website.git');
set('branch', 'master');

// Will be effective with Deployer 7.0
// set('current_path', '{{deploy_path}}/user');

// Writable dirs by web server
set('writable_dirs', []);
set('allow_anonymous_stats', false);

// Hosts
host('bbqsoftwares.com')
    ->user('deploy')
    ->stage('prod')
    ->set('deploy_path', '/var/www/bbqsoftwares.com');

host('bbq.test')
    ->user('vagrant')
    ->stage('dev')
    ->set('deploy_path', '/home/vagrant/bbqsoftwares');

// Install grav task
task('grav:install', function () {
    within('{{deploy_path}}', function () {
        run('bin/grav install');
    });
});

// Clear grav cache task
task('grav:clearcache', function () {
    within('{{deploy_path}}', function () {
        run('bin/grav clearcache');
    });
});

// Tasks
desc('Deploy your project');
task('deploy', [
    'deploy:info',
    'deploy:prepare',
    'deploy:lock',
    'deploy:release',
    'deploy:update_code',
    'deploy:shared',
    'deploy:writable',
    'deploy:clear_paths',
    'deploy:symlink',
    'grav:install',
    'grav:clearcache',
    'deploy:unlock',
    'cleanup',
    'success'
]);

// [Optional] If deploy fails automatically unlock.
after('deploy:failed', 'deploy:unlock');
Setting up the Server
Permission strategy
Now, if you were to test the deploy task to the production server right away, it wouldn’t work as some permission issue would be encountered. You could actually replace ->user('deploy')with your user right now (i.e. malou in my case) and run the script, but all files and directories created by Deployer would belong to the malou:malou user/group combo. This is not good as, in my case, Nginx user is www-data and wouldn’t be able to read or write my file without the proper permission and vice versa.
To avoid this permission issue while keeping things secure, we need to implement a simple strategy :
- Use a dummy user called
deployto connect to the server to maximize security; - Assign
www-datauser to Nginx process (default behaviour); - All files and directory will belong to that
deployuser with read/write permission so he can fetch the new content; - All files and directories belong to a
www-datagroup (common todeployandwww-data, Nginx user) with read only permission so Nginx can serve the site; - Give group write access to specific files and directories so Nginx can overwrite them (such as cache, etc.)
Note that I use the www-data group name as it’s the default one already used by the Nginx user. Also, for maximum security, deploy shouldn’t be shared across multiple site you would have on the same server ideally.
So to sum up, the ideal solution is for all files/directory to belong to deploy:www-data with user read-write-execute and group read-execute permission, with exception for directory that does require to be writable by the server, in which case we’ll give them group write permission. This means deploy can overwrite any files during deployment and Nginx can read everything and write only what it needs to.
To work properly, the webserver (Nginx) requires read permission to all files, but only write access to certain files and folders. With Grav, the cache/directory is one of those directory which requires such write access. By giving read only permission to other directory to the webserver, we make sure malicious code or security flaws have a hard time overwriting critical Grav code or the site content itself.
One problem with this strategy is our normal user, malou in my case, will have the same permission as Nginx. In other work, my user won’t be able to overwrite most files. But this doesn’t matter much, as this user will usually be used via the command line and can make use of sudo when needed.
Creating the deploy User
Let’s start by creating our deploy user, sets it’s group to www-data on the server [1]:
sudo useradd -G www-data deploy
groups deploy
While at it, we can also add our user to the www-data group right now. Replace MYUSER with your username of course :
usermod -a -G www-data MYUSEROn your local machine, we create an arbitrary ssh key pair. It will be saved to ~/.ssh/deploy_rsa so your personal key is not overwritten[2]. I don’t use passphrase:
ssh-keygen -t rsa -f ~/.ssh/deploy_rsa
cat ~/.ssh/deploy_rsa.pub
Copy the displayed key. Back on the server, we associate the public key to the deploy user:
sudo mkdir -p /home/deploy/.ssh
sudo nano /home/deploy/.ssh/authorized_keys
On your machine, you can test that the ssh connexion works. Just replace the domain with yours:
ssh deploy@bdomain.com -i ~/.ssh/deploy_rsaWe now add our identity file to the host definition in the deploy script so we can test locally. This will be removed later when the private key is copied to GitHub :
// Hosts
host('bbqsoftwares.com')
    ->user('deploy')
    ->identityFile('~/.ssh/deploy_rsa') // <-- HERE
    ->stage('prod')
    ->set('deploy_path', '/var/www/bbqsoftwares.com');
Setting Up the Site on the Server (From Scratch)
After creating a backup of the existing site, I decided to start from scratch to be sure. This means cloning a fresh copy of Grav. We’ll also give that directory the correct basic permission :
sudo git clone https://github.com/getgrav/grav.git /var/www/bbqsoftwares.com
cd /var/www/bbqsoftwares.com/
sudo chown -R deploy:www-data .
At this point, we can run the deployment script a first time from a local computer so current/ link will be created:
dep deploy prodOnce this is done, we need to set the link from current/ to Grav’s user/ on the server. Apply the permission again:
sudo rm -R user/
sudo ln -s current user
sudo chown -R deploy:www-data user
Remember, everything here required to be run with sudo as my user (malou) doesn’t have permission to write deploy:www-data stuff yet. At this point however, the Grav install hasn’t been run on the actual current files yet. So let run dep deploy prod again to do just that, and not mess too much with permission. We can now inspect the current permission using ls -la:
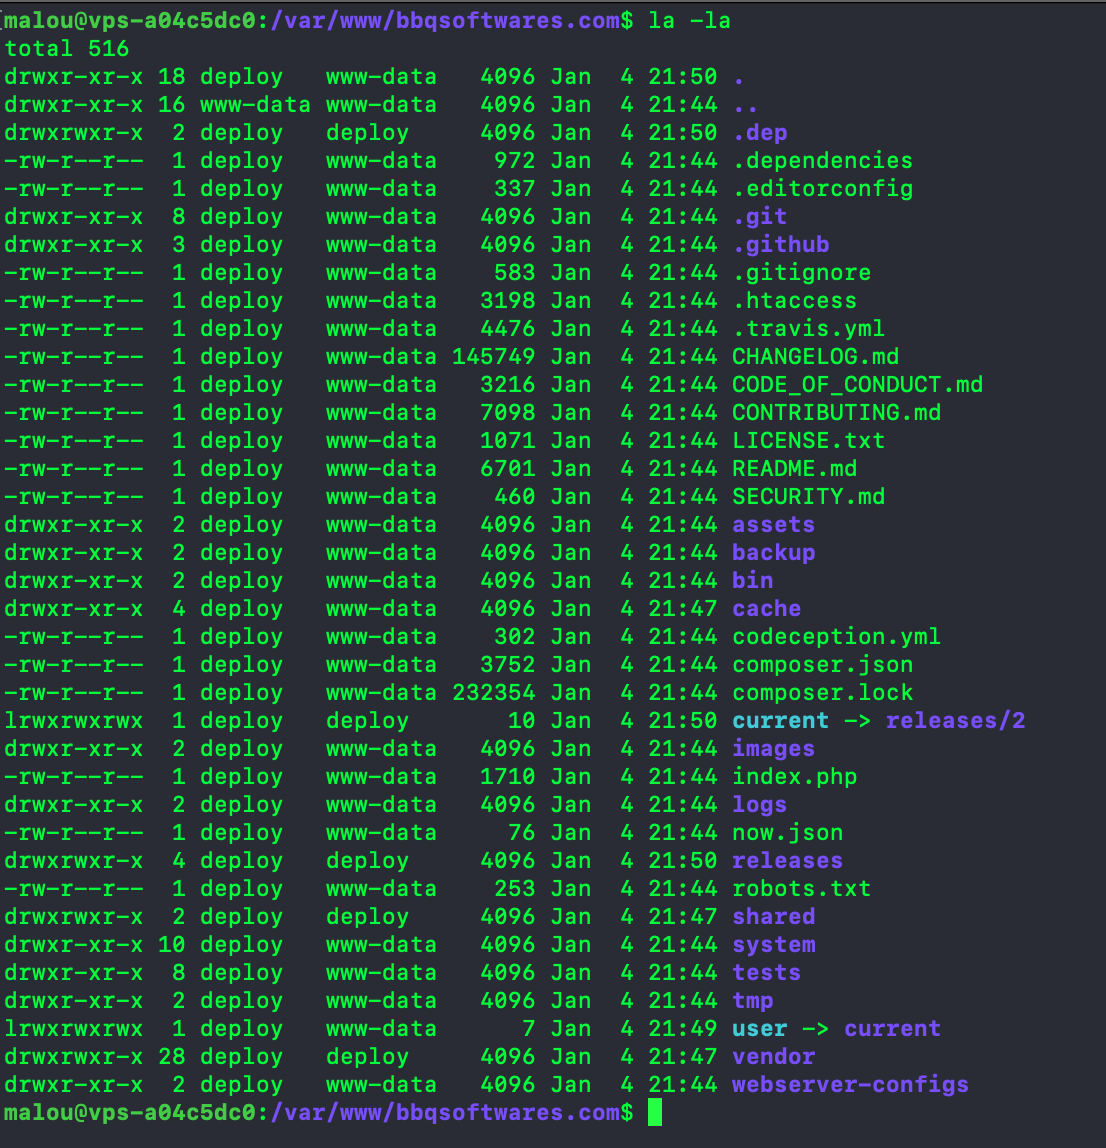
Some directories are still owned by the deploy group because we didn’t change the default permission yet. As a result, the site won’t be accessible just yet (should return a 500 HTTP error).
Let’s temporary fix all permission manually and make sure the site is accessible :
sudo chown -R deploy:www-data .deploy:deploy or you’ll get an error since cache/ is not writable by deploy just yet.Going back to the site will now result in this error. But that’s fine, because we want to know what needs to be writable.
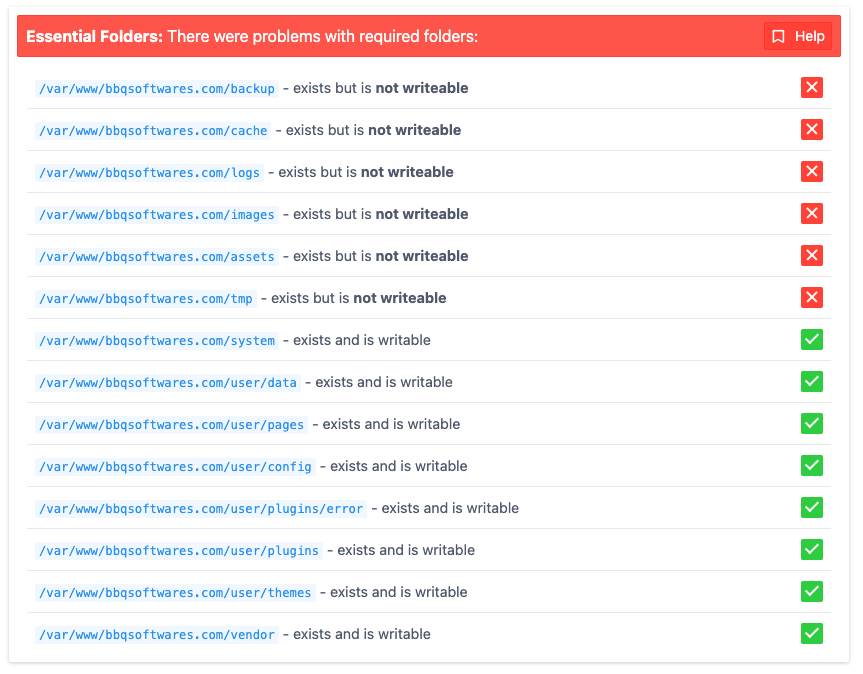
Next step is to install ACL and set the default file and directory permission according to our strategy[3],[4] :
# Install ACL
sudo apt install acl
# Set everything to group r-x
sudo setfacl -R -d -m group:www-data:r-x .
sudo setfacl -R -m group:www-data:r-x .
# Set what need to be writable to rwx
sudo setfacl -R -d -m group:www-data:rwx backup/ cache/ logs/ images/ assets/ tmp/ user/*/config/ user/config/ user/data/
sudo setfacl -R -m group:www-data:rwx backup/ cache/ logs/ images/ assets/ tmp/ user/*/config/ user/config/ user/data/
# Change mode so all new files and directory belongs to www-data group
sudo chgrp -R www-data .
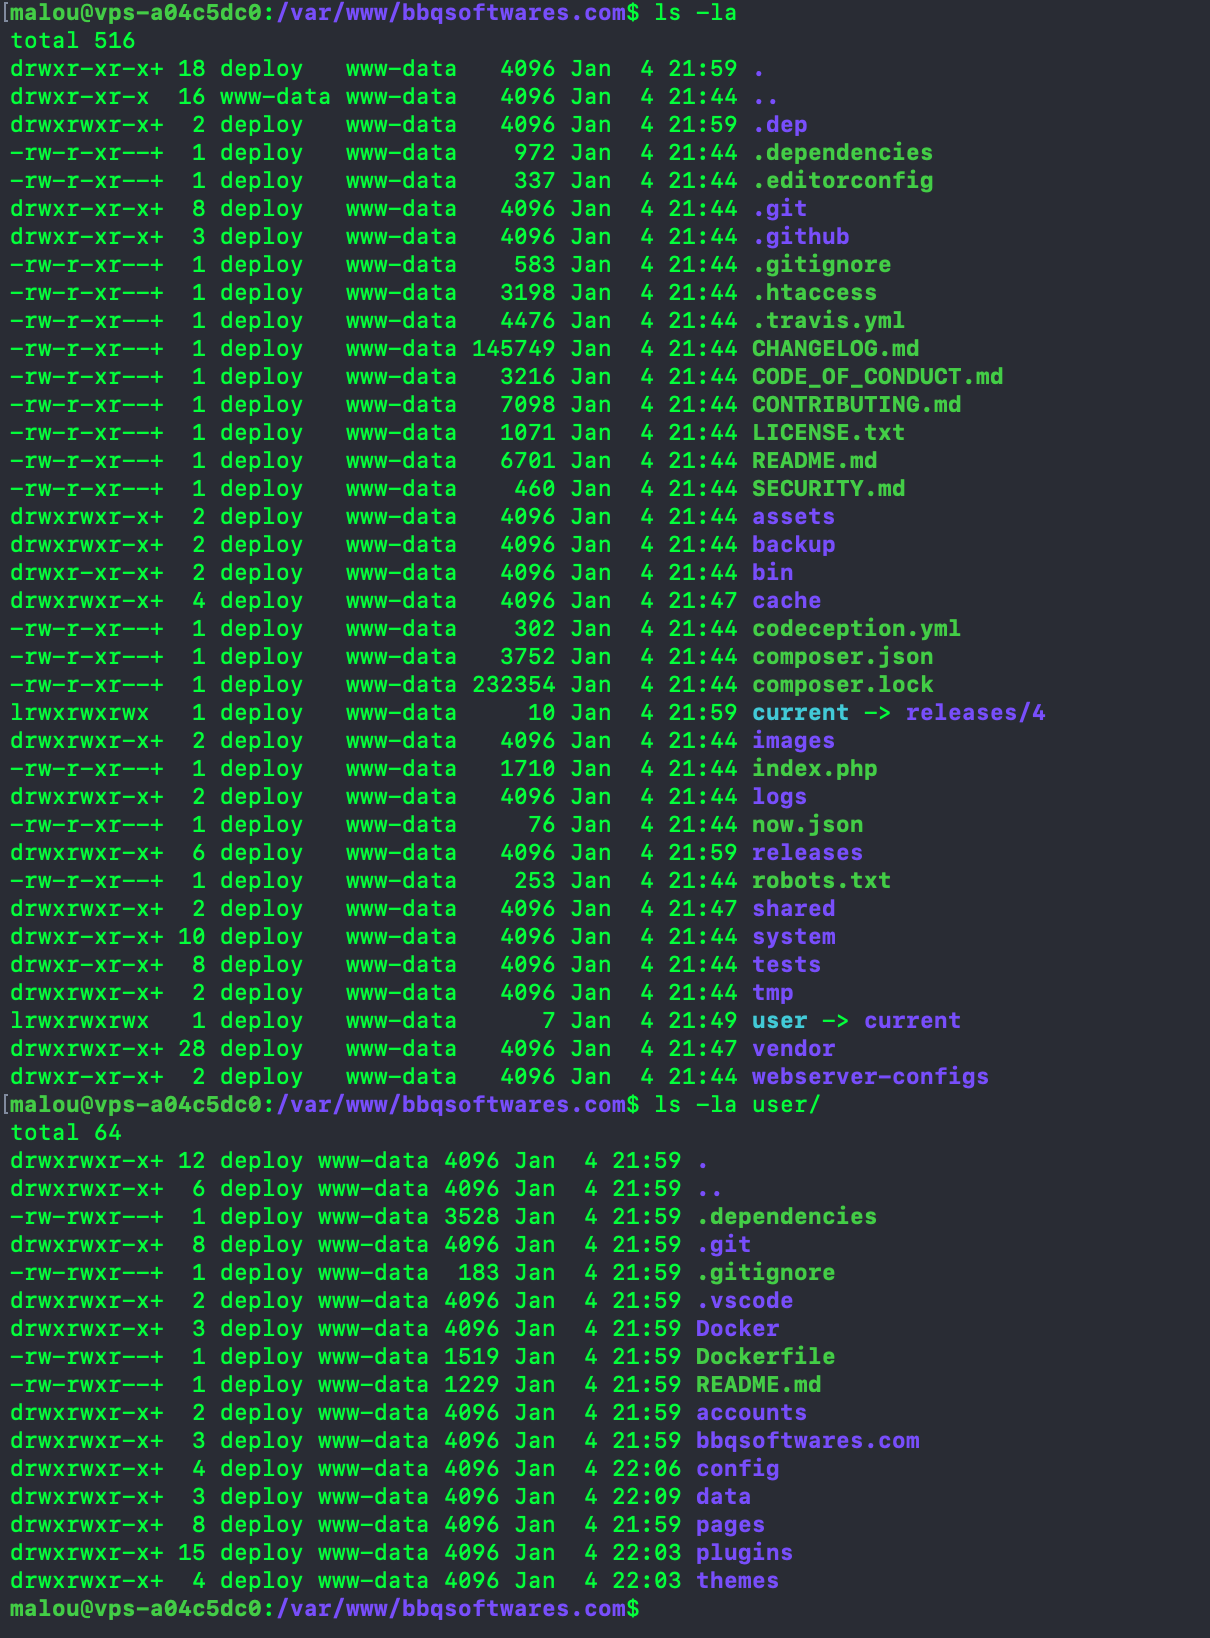
sudo chmod -R g+s .At this point, you should be able to access the site without any issue. In case of a 500 error, you can inspect the Nginx logs, which will probably point you to an additional directory or files that requires write permission (which might appends with some plugins). The deploy script (dep deploy prod) should also work without any issue when run locally. Listing all permission after any deployment should show you that all files belong to deploy:www-data.
Create the Actions
Now that the deployment process actually works, it’s time to automate it using GitHub Actions. For this, we need to do three things. First, add our deploy.php to the repo. Second, create a new workflow file. And last, add our private key to the server in the Github repo secrets. I’ll do this last, as it will allow me to test the action before actually pushing to the server.
First step is relatively easy. We simply need to copy our Deployer script deploy.php to our repo. The expected location for this file would be at the root of our repo, but I’ll complicate things a bit by “hiding” it inside the .github/ directory. The only real complication here is we’ll have to specify which file to use in our actions, with the -f flag : dep deploy prod -f .github/deploy.php. We also need to remove the ->identityFile('~/.ssh/deploy_rsa') part from the deploy script as it won’t be necessary for the action and is only useful when running locally.
Now, to define the action, we create a new file in .github/workflows/deploy.yml:
name: Deploy to Production
on:
  push:
    branches:
      - 'master'
jobs:
  deploy:
    name: Deploy code to prod
    runs-on: ubuntu-latest
    steps:
    - name: Checkout
      uses: actions/checkout@v1
    - name: Deploy
      uses: musps/action-deployer-php@master
      with:
        args: deploy prod -f .github/deploy.php
      env:
        SSH_PRIVATE_KEY: ${{ secrets.PRIVATE_KEY }}
A few interesting bits can be found in this workflow file. First of all, if you’re not familiar with GitHub action yet, go try it out. It’s fast, it’s flexible… it’s awesome ! This action makes use of musps/action-deployer-php instead of the official Deployer Action because the official one wasn’t working because of issues #1 & #4.
First, Note that you can also change the name to your liking, they are only displayed on the Github website. You’ll also notice the action is set to run when a push action happens on the master branch. In my case that branch will always host the live copy of the site, but you could also want to run it only when a new release is made. In this case, you can change this line to[5] :
on:
  push:
    branches:
      - 'releases/*'
Next, you’ll see this bit which contain two important things :
with:
    private-key: ${{ secrets.PRIVATE_KEY }}
    dep: deploy prod -f .github/deploy.php
First, in the dep command I added the path to .github/deploy.php. This argument won’t be necessary if the deploy file is at the root of the project. You can also see here the PRIVATE_KEY secret which will contain your secret private key that we don’t want to publish inside the repo.
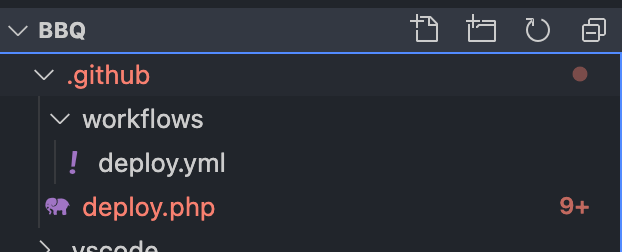
We can now push those two new files to GitHub project. The file structure will now look like this:
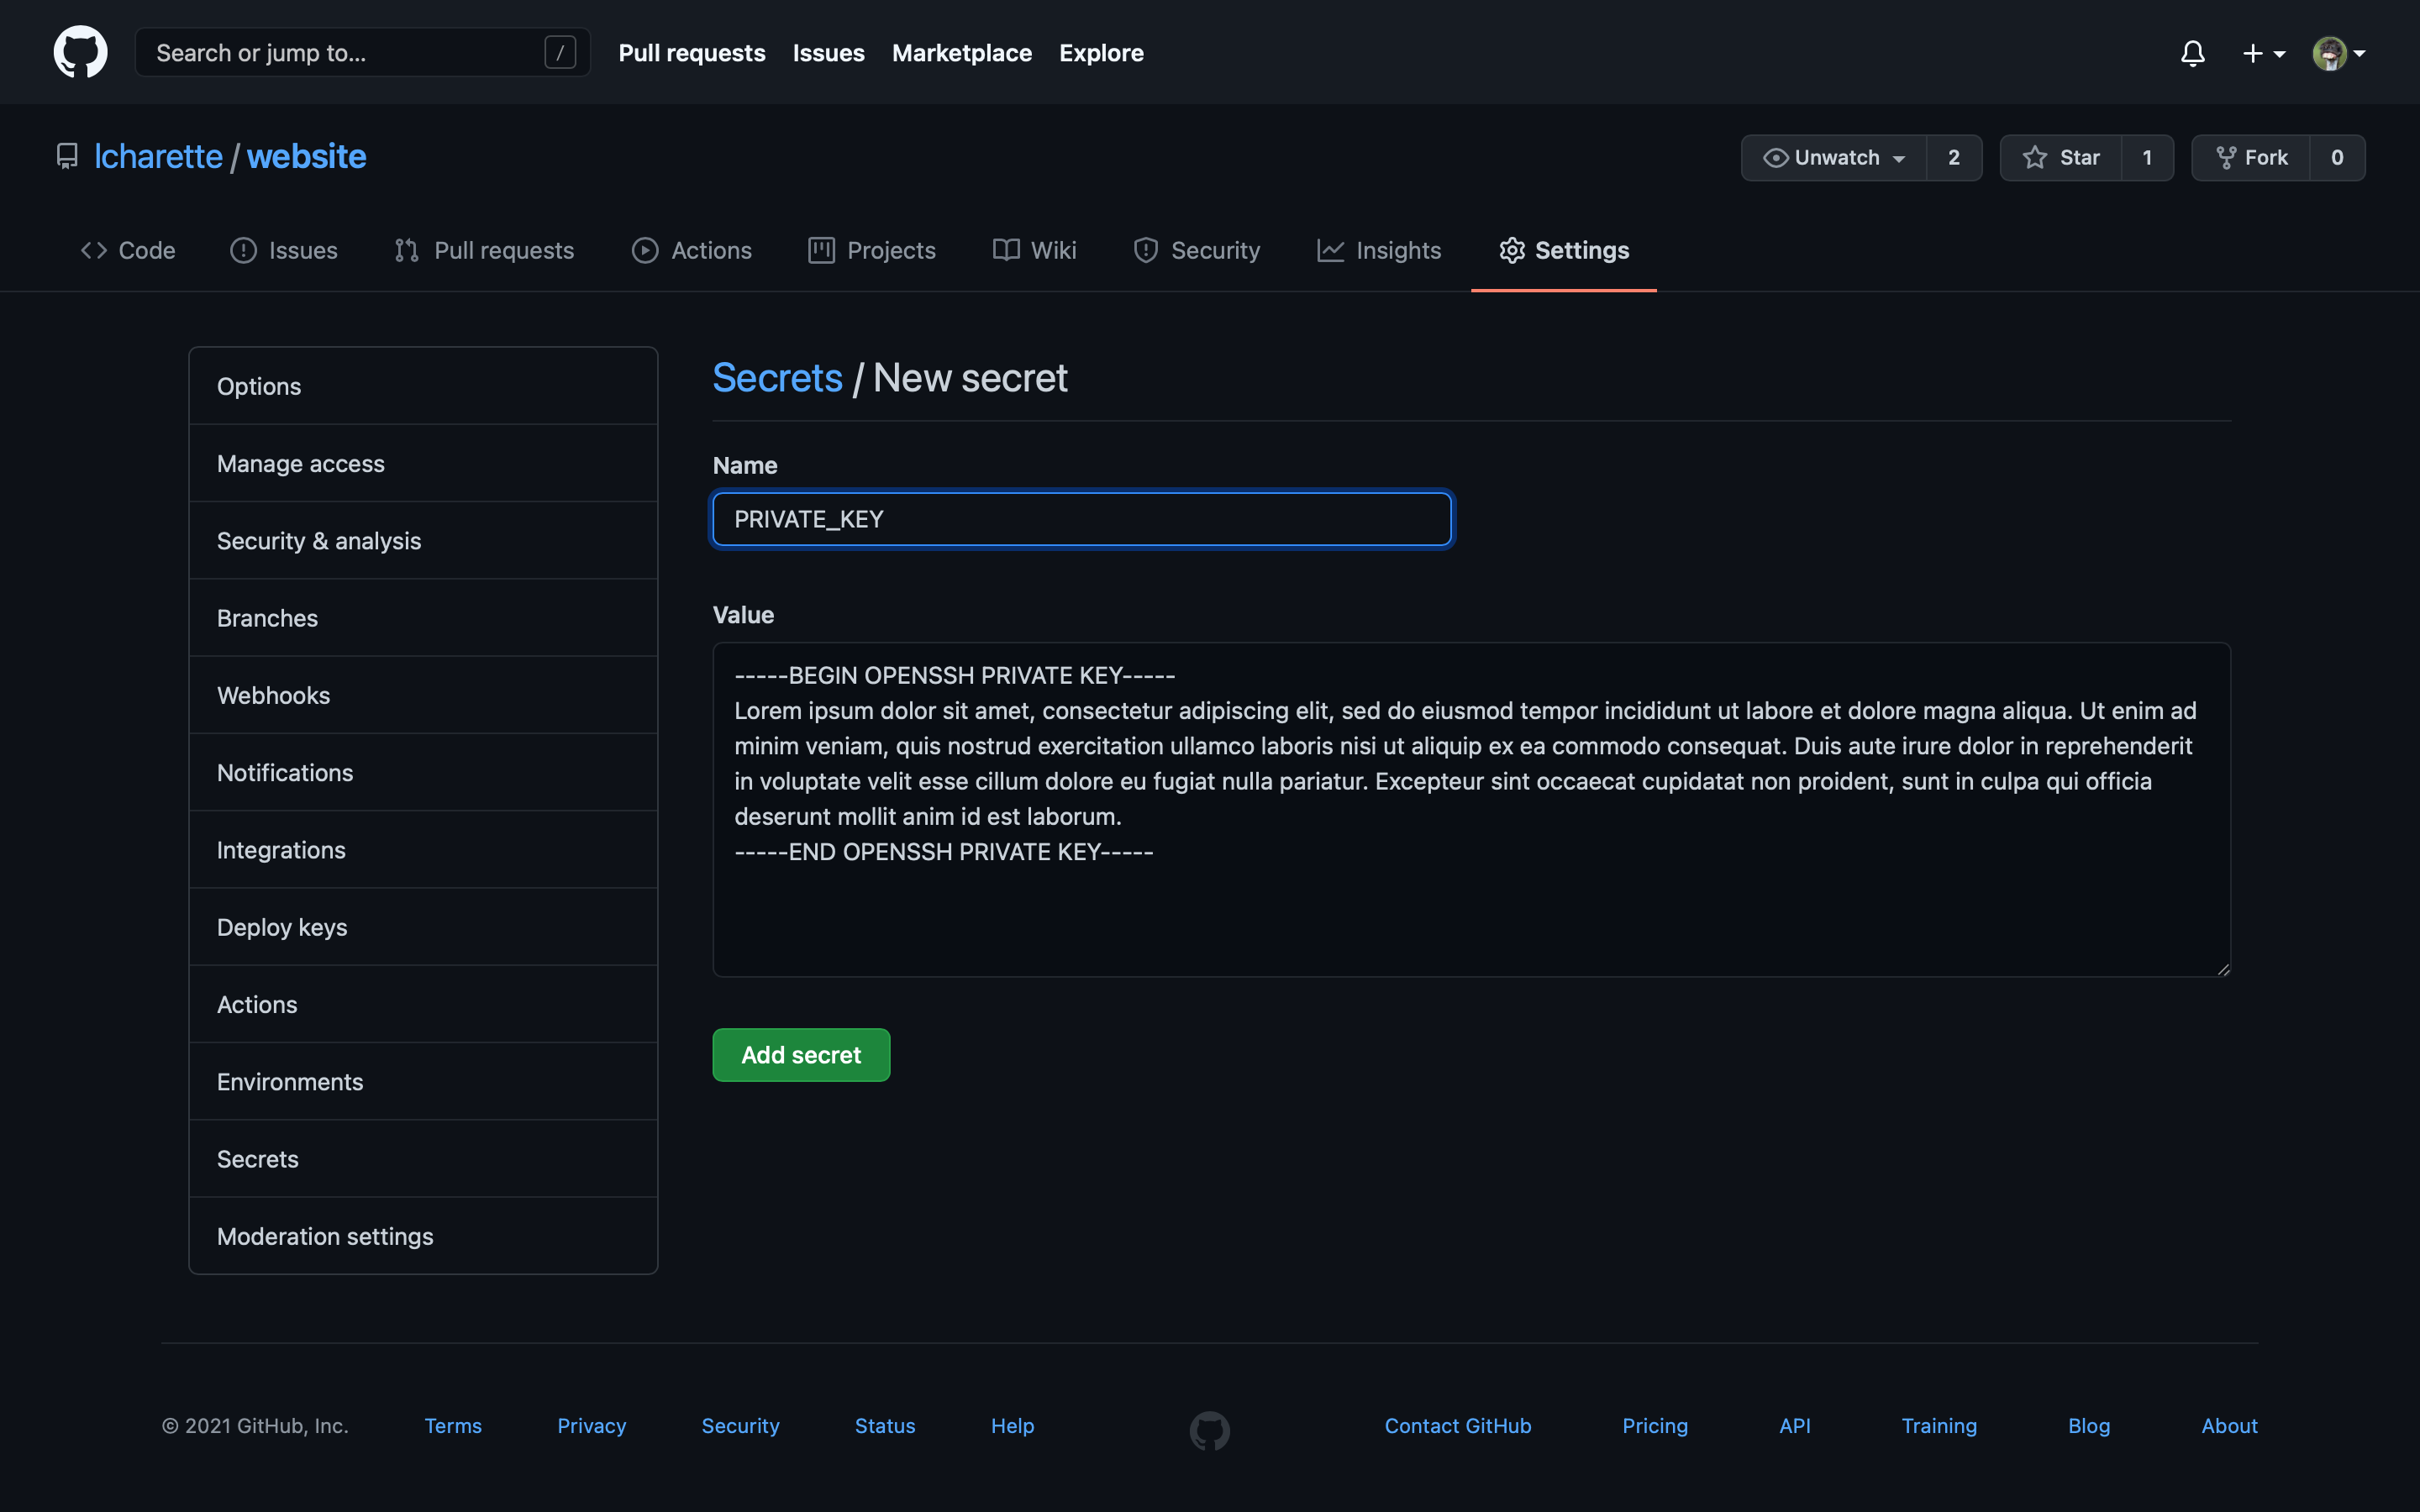
Once pushed, we inspect the result in the Actions tab. Obviously, it will fail as the ssh keys has not been setup yet. The secret key can now be copied over to GitHub. That key is the one generated when we created our deploy user. However, while we copied the public key to the server then, now we’ll want the key inside the ~/.ssh/deploy_rsa file. This key will begin with -----BEGIN OPENSSH PRIVATE KEY----- and end with -----END OPENSSH PRIVATE KEY-----.
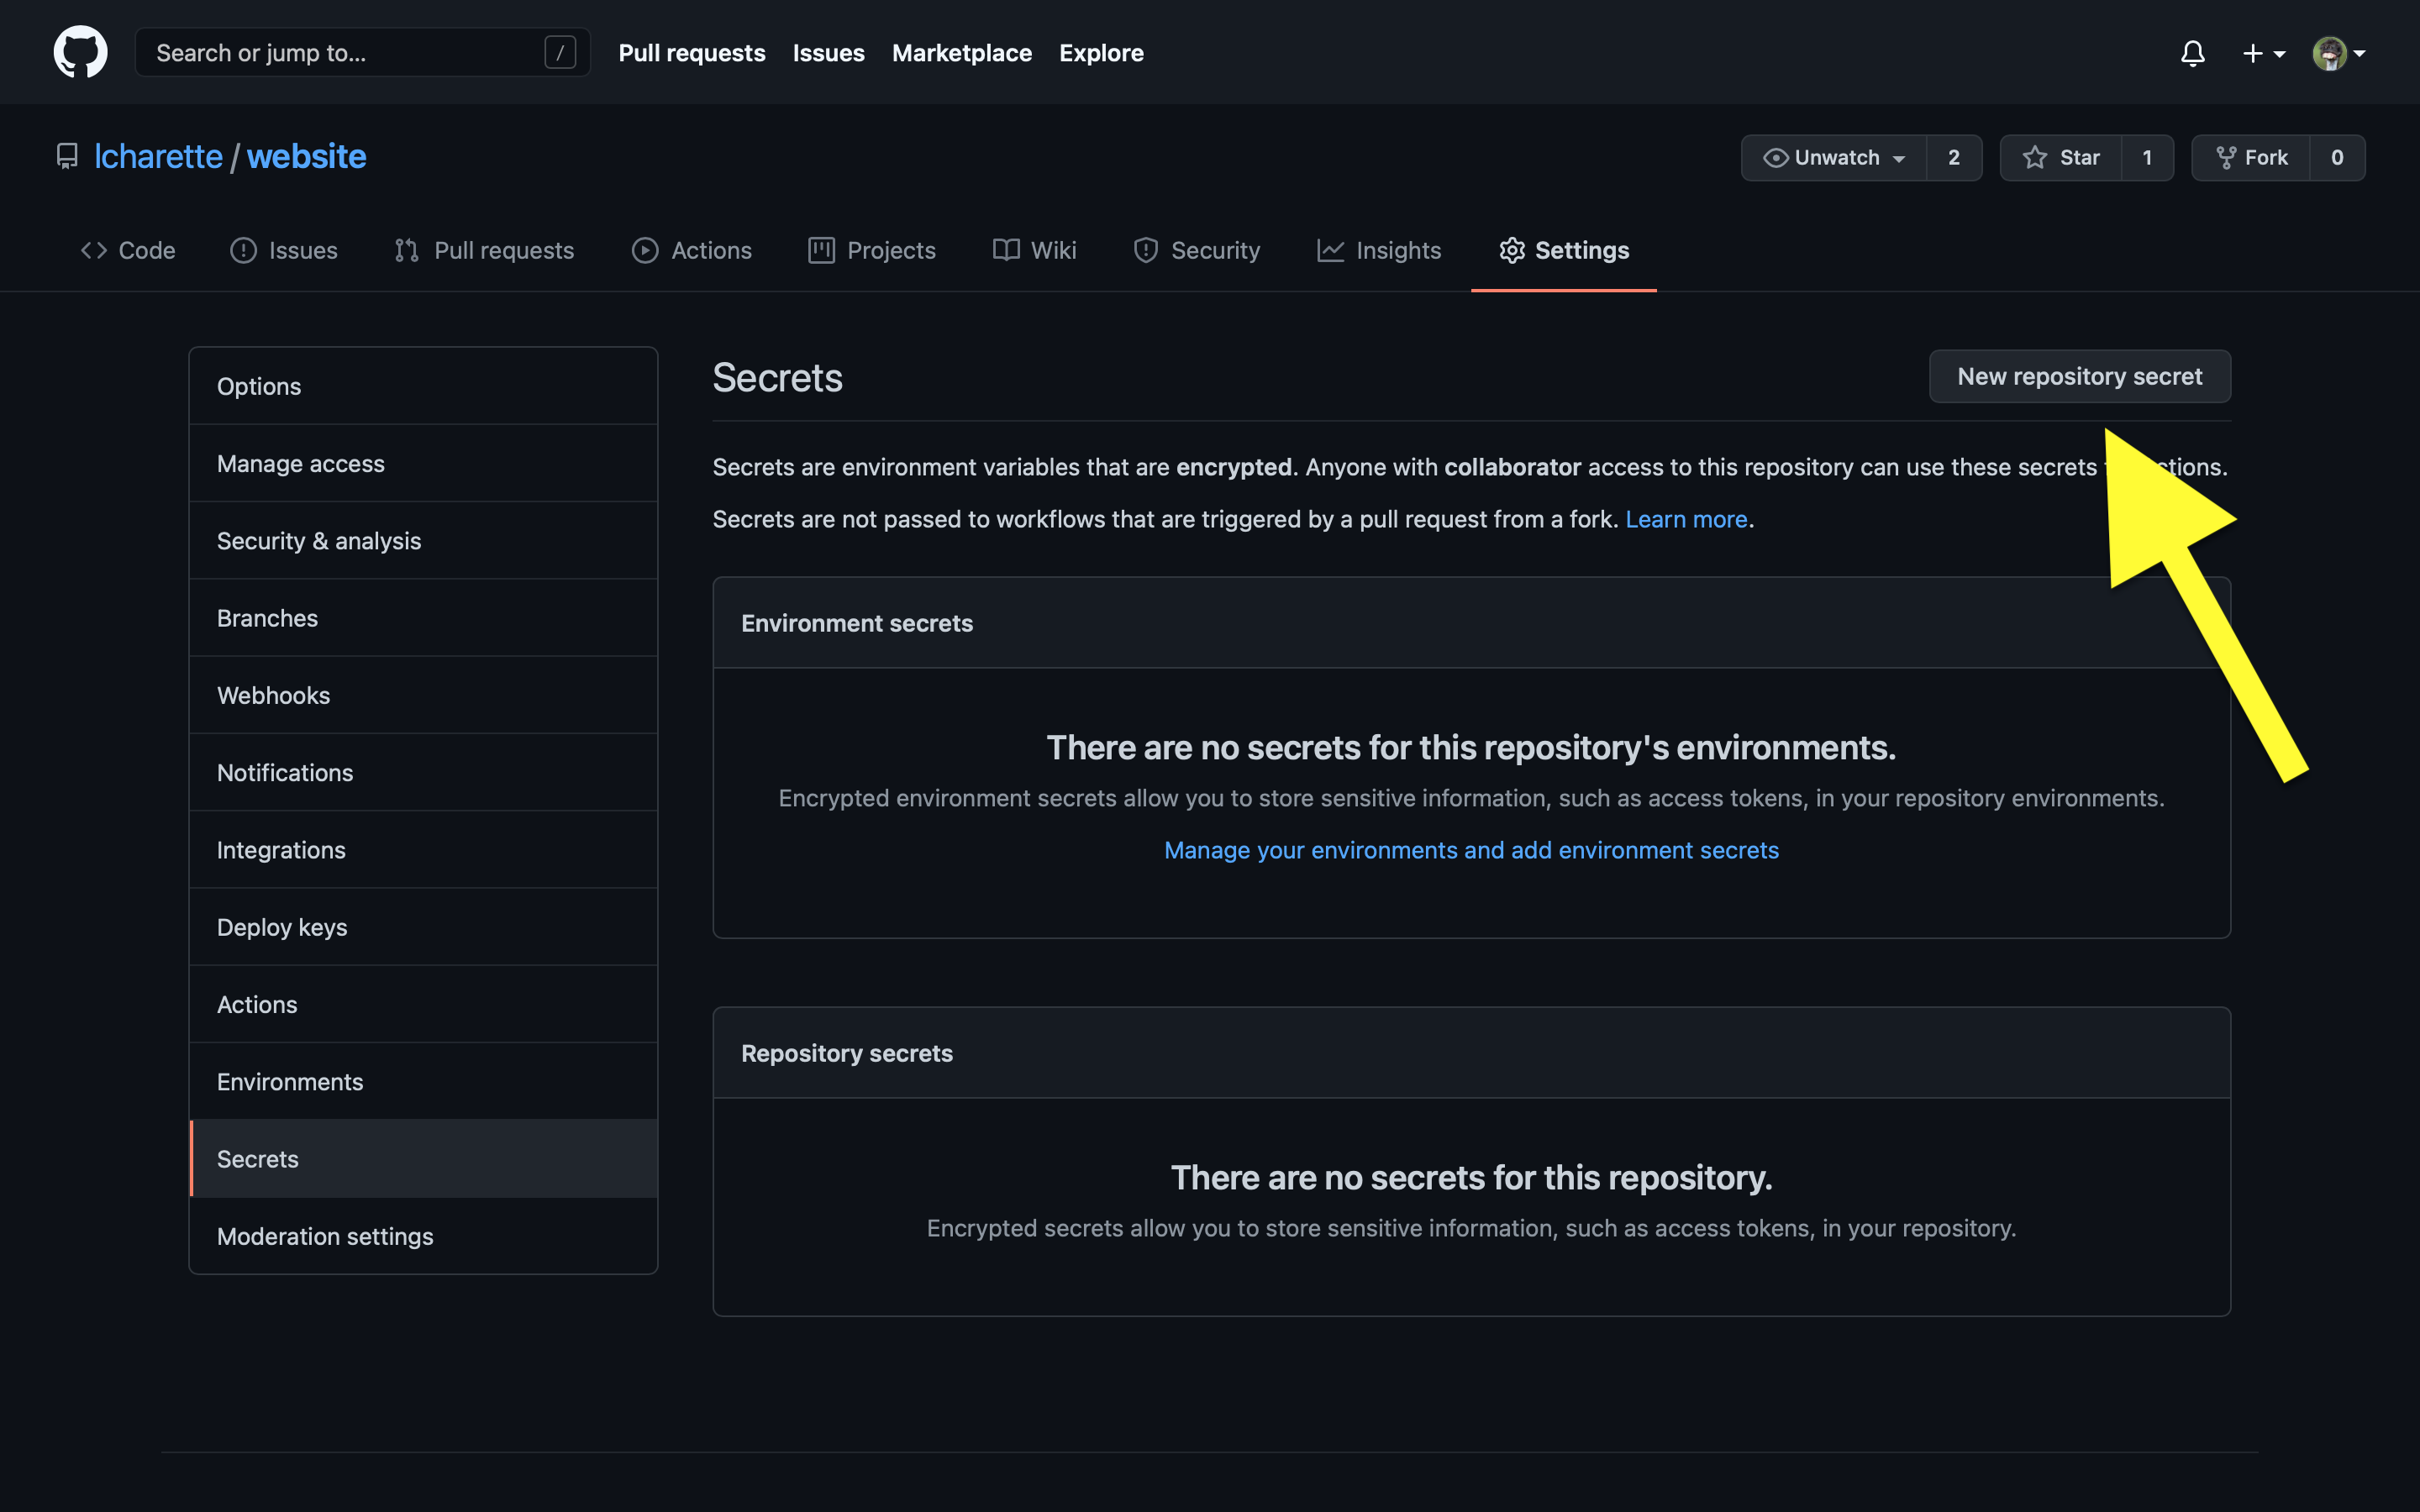
In your Github Repo, go to “Settings -> secrets” and click “New repository secret”:
Be sure to name the secret PRIVATE_KEY, paste your key here and click “Add secret”:
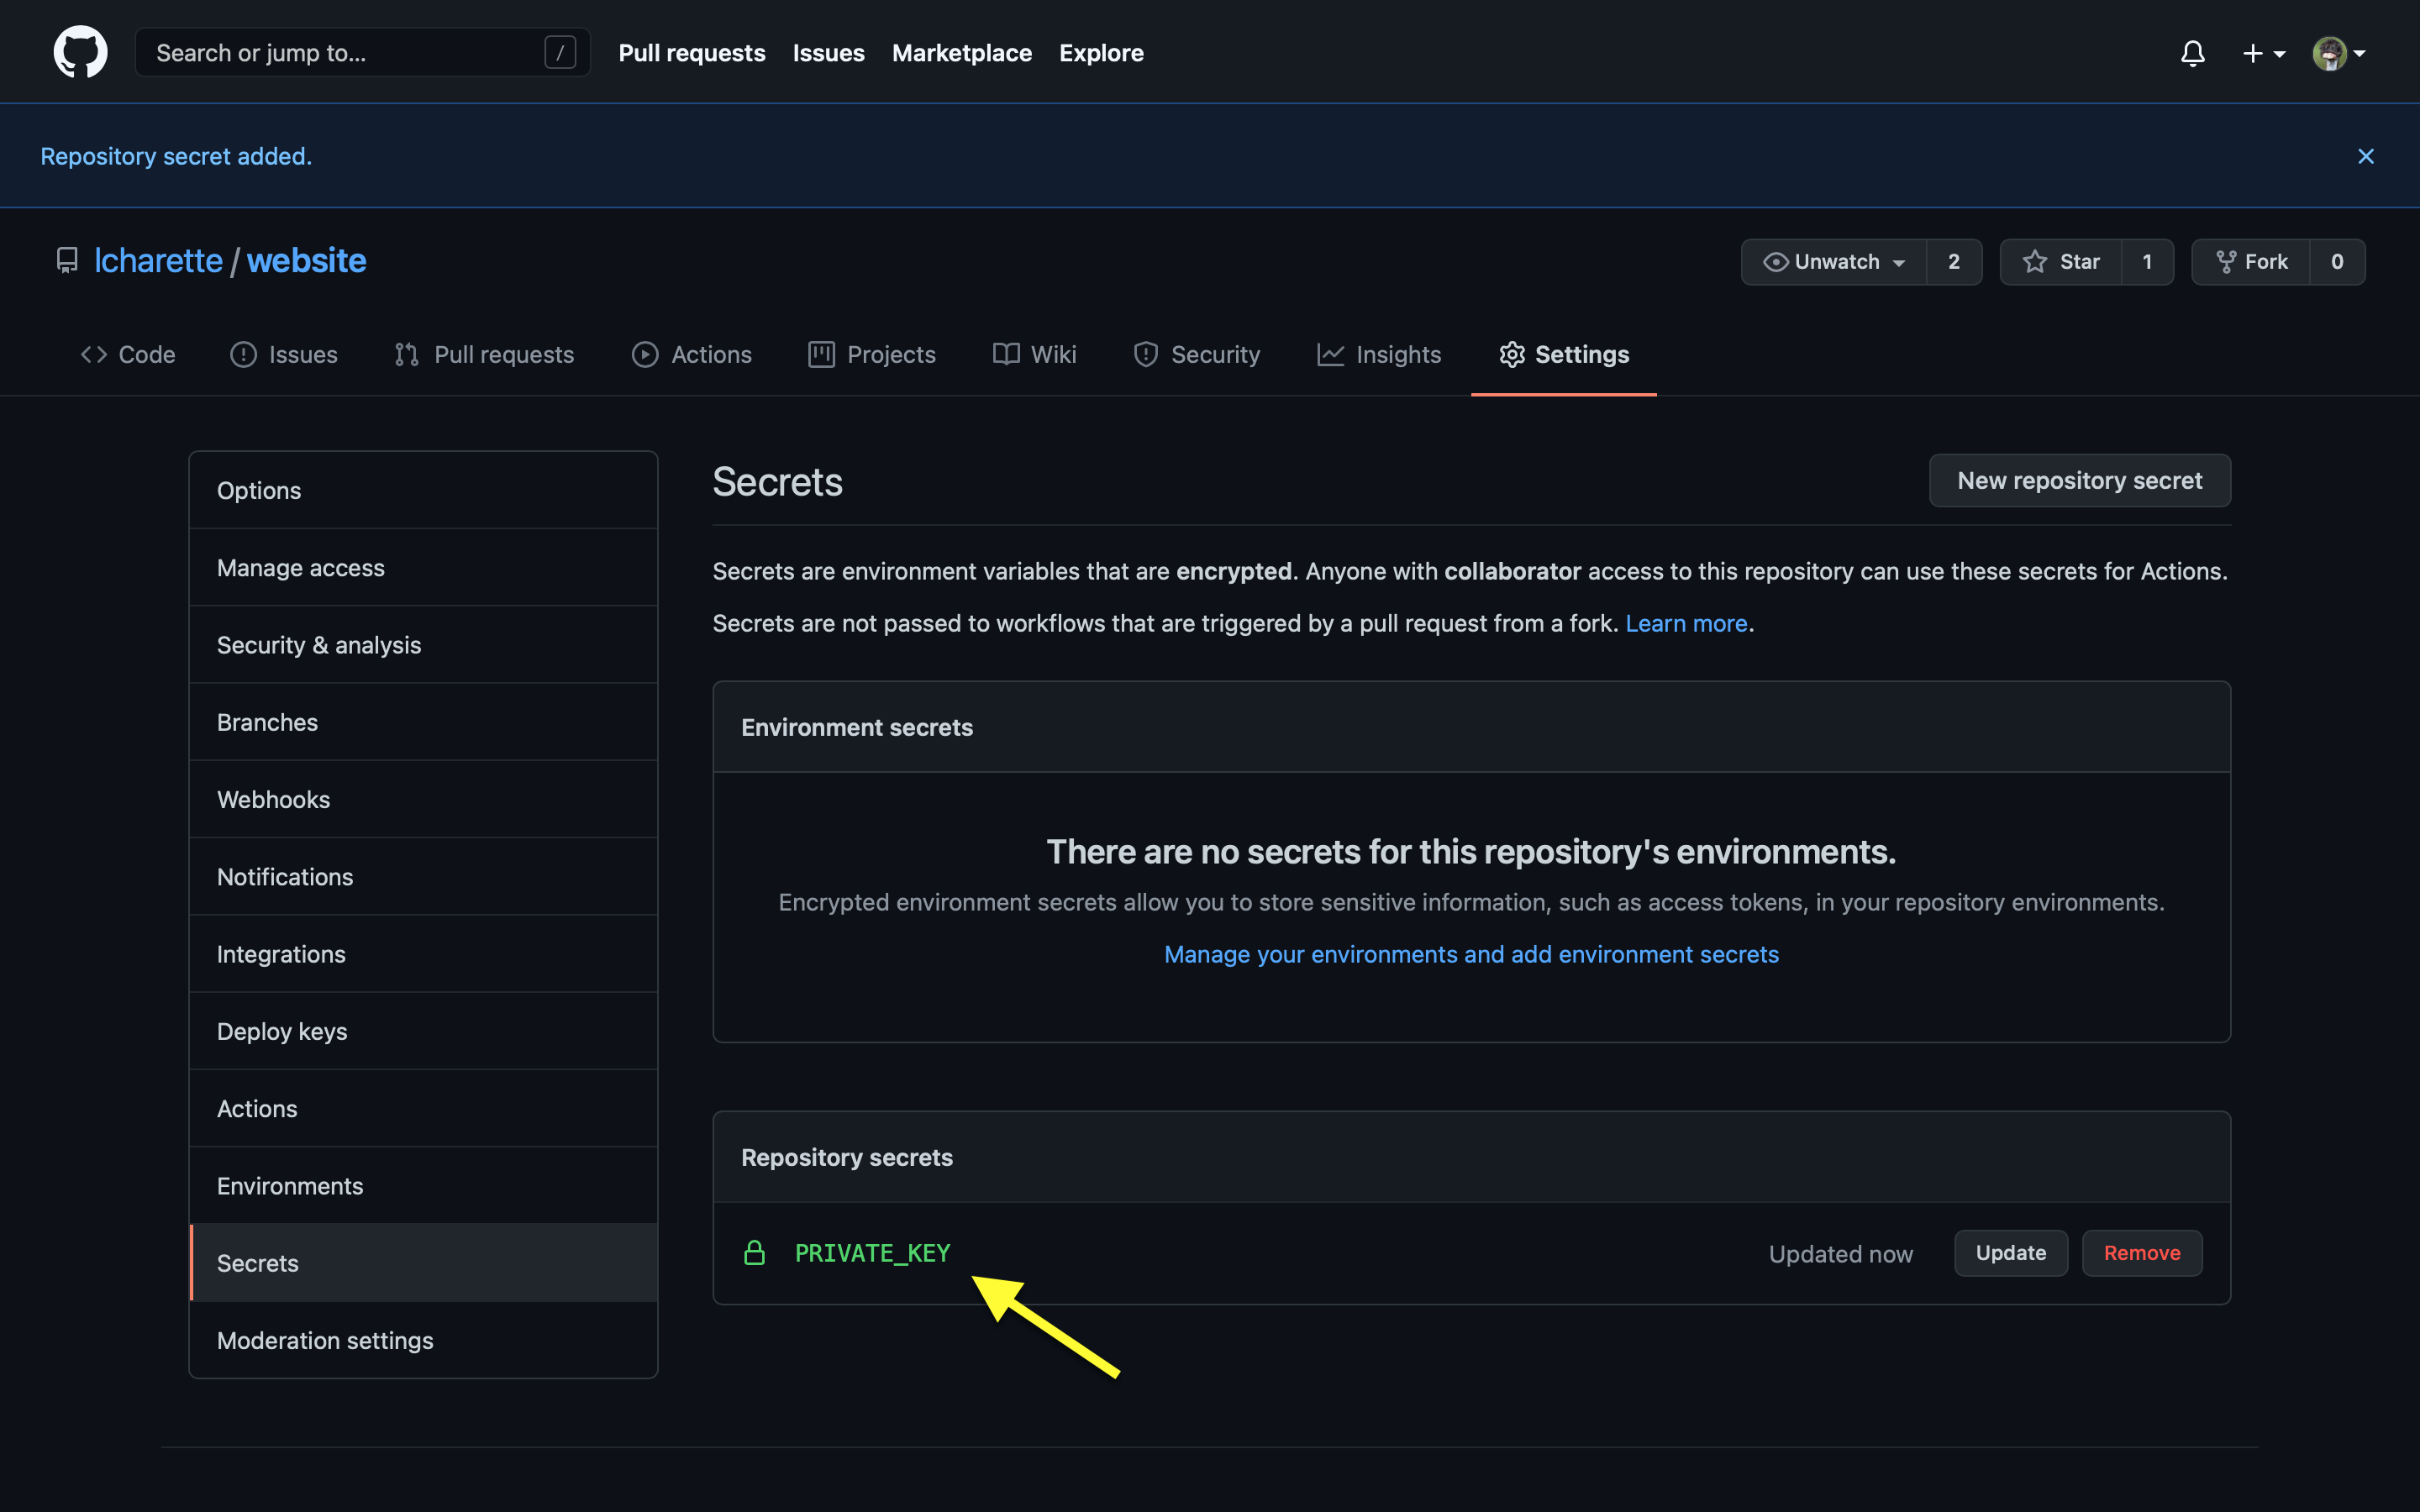
How secret is now set for this repository:
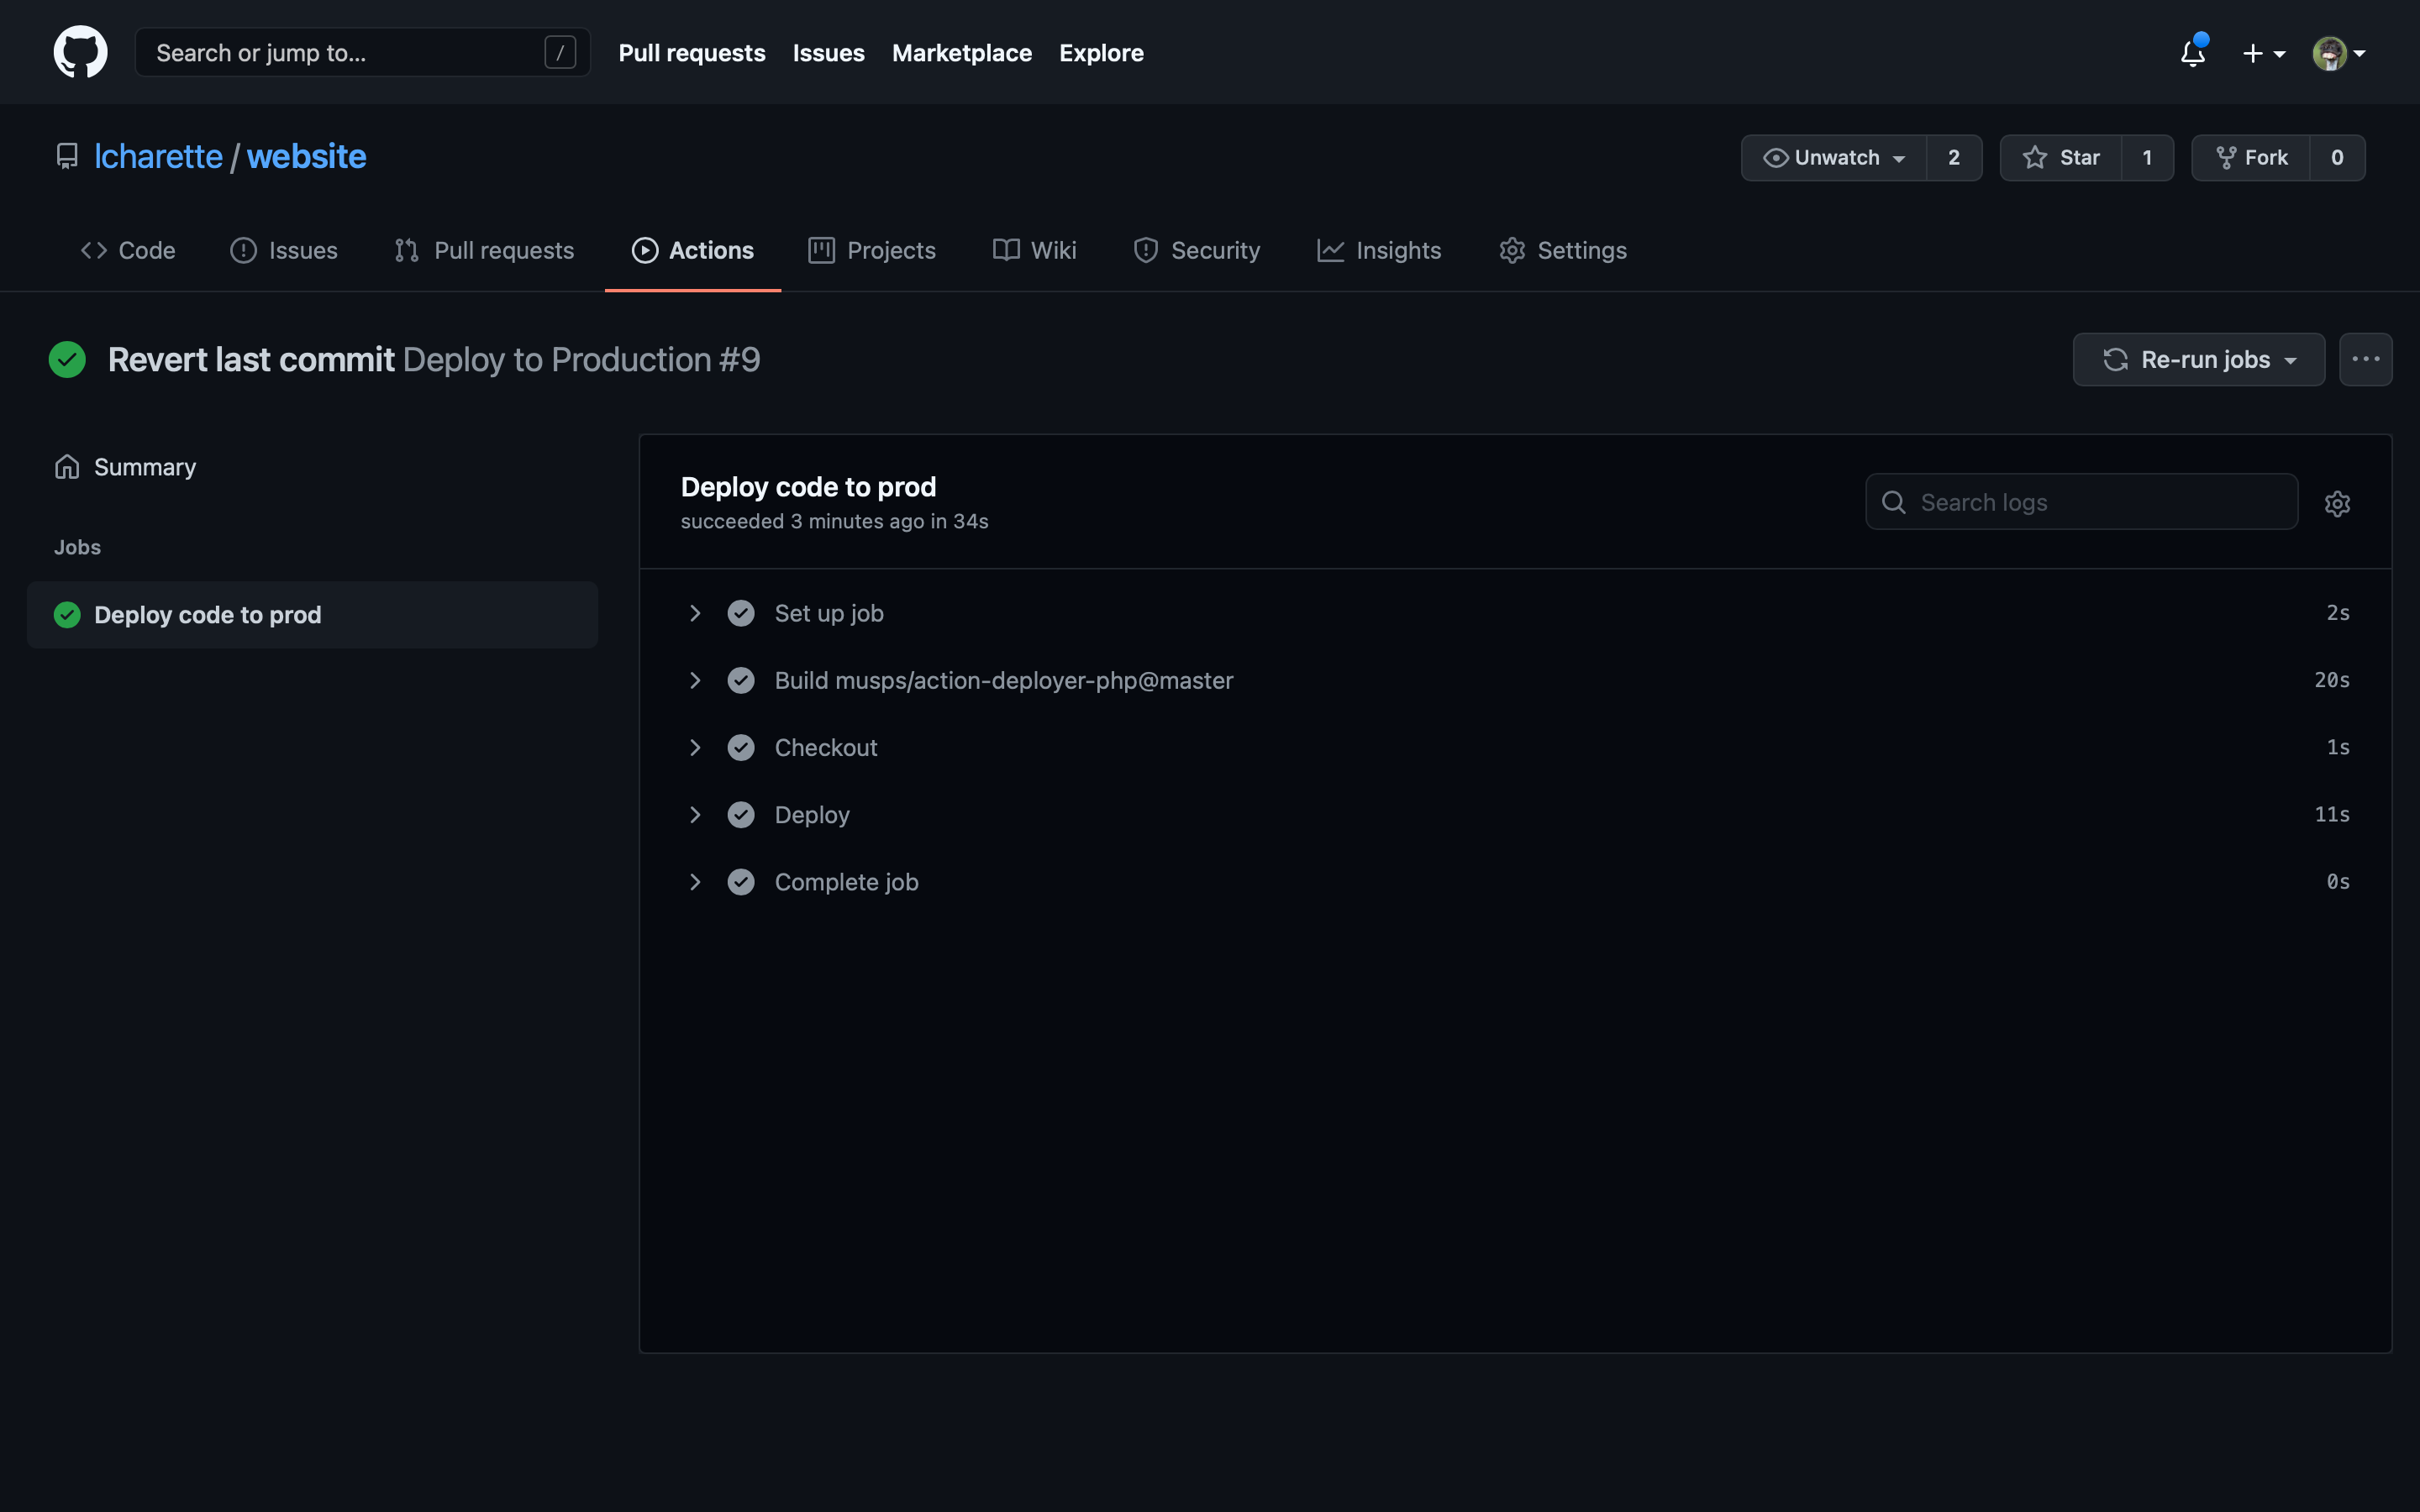
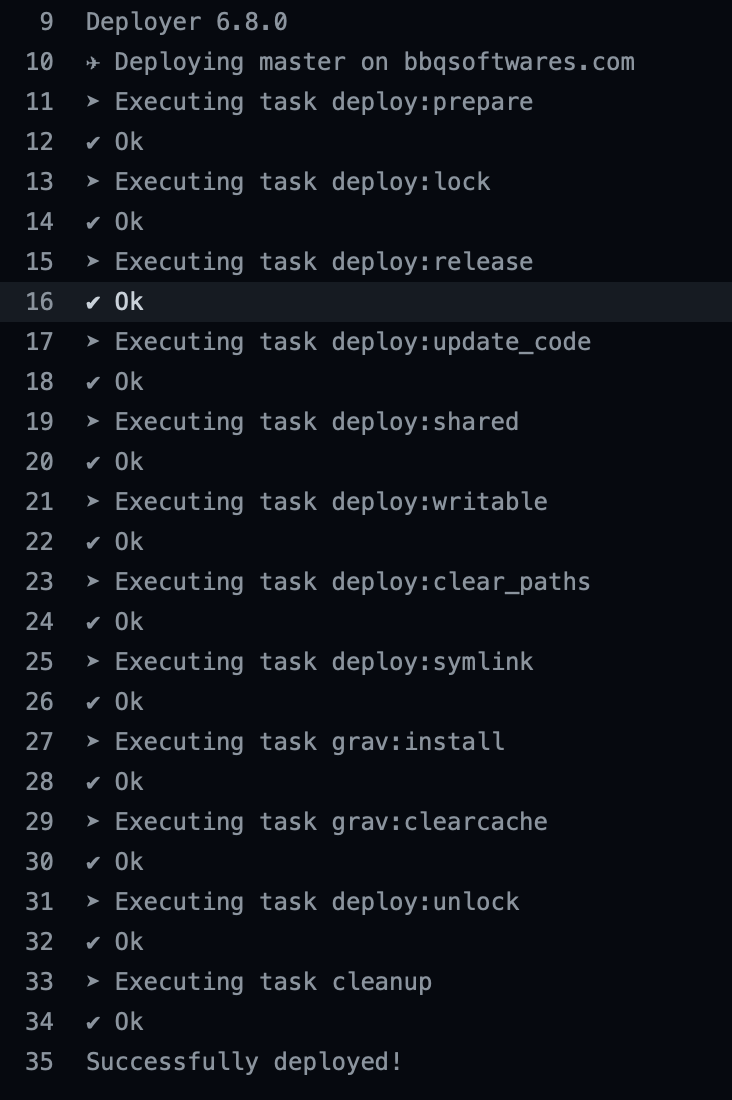
We can now run the job again by pushing new content to the master branch or by using the “Re-run jobs” button. Everything should be green, developing the “Deploy” task will show the output as everything worked fine and the site should work properly !
Conclusion
At this point, time will tell if this solution is robust, but I do believe it is more than the one I used in 2019 (that turned out to be a total failure). I still need to find a solution to include Grav setup in the deployment script to achieve true zero downtime deployment, but for now, and for the low importance of this site, I think it’s good enough.
Being able to use GitHub Action instead of webhooks helped a lot compared to the last time I tried this. The downside is you need to supply a ssh key to Github so it can access your server. Giving anyone access to your server will always comes with a risk, but in this case I do believe the risk is minimal since the user access on the server is pretty limited. Sure deploy has access to everything owned by www-data group now, which means it probably has access to other sites hosted on this server. This could be mitigated by creating a new group specific to this site. After all, the more secure solution is still to give as little access to anything and anyone.